Publish pages
Overview
Every page has a publication state that decides who can see it. New pages start as drafts — visible only to the teaching team — until you publish them. You can publish a page immediately or schedule it to publish automatically at a future date and time. Every publication action lives in the three-dot Page Options menu at the top right of the open page. This article covers each state and how to move between them.
Before you start
- You must be an instructor or on the teaching team for the course.
- You need at least one page. See Create and organize pages.
Publication states
A page is always in one of three states, shown as a badge next to the page name and on its row in the tree sidebar:
- Draft — visible only to the teaching team. This is where every new page starts.
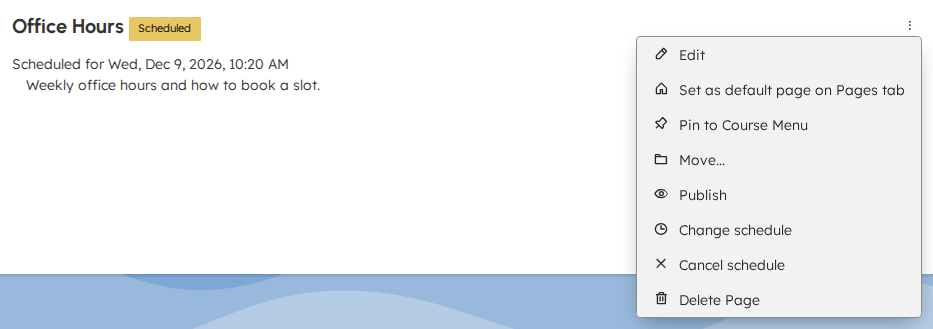
- Scheduled — a draft with a future publish date. It stays teaching-team-only until that moment passes, then becomes visible to students automatically. Hover the badge to see the scheduled date and time.
- Published — visible to students (no badge).
The teaching team always sees the full state and every page, regardless of these controls. Students only ever receive published pages — TeachFront strips drafts and not-yet-due scheduled pages from what students load.
Publish a page now
- Open a draft page.
- Select the three-dot Page Options menu at the top right of the page.
- Select Publish.
Expected result
- The Draft badge clears.
- The page becomes visible to students immediately.
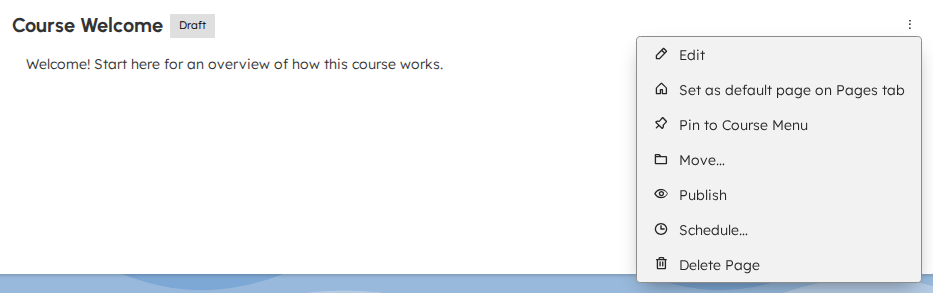
You can also publish while editing: select Edit in the Page Options menu, make your changes, and select Save and Publish to save and publish in one step.
Schedule a page to publish later
- Open a draft page.
- Select the three-dot Page Options menu.
- Select Schedule….
- In the Publish on panel, choose a future date and time.
- Select Save schedule.
The publish time must be in the future — TeachFront rejects a past date and tells you to publish the page directly instead. Select Cancel to close the panel without scheduling.

Expected result
- The page shows a Scheduled badge; hovering it shows the publish date and time.
- The page stays teaching-team-only until that moment passes, then becomes visible to students — no further action needed.
Manage a scheduled page
When a page is scheduled, its Page Options menu offers:
- Publish — make it live immediately instead of waiting.
- Change schedule — reopen the Publish on panel and pick a different date and time.
- Cancel schedule — return the page to a plain draft with no publish date.
Unpublish a page
- Open a published page.
- Select the three-dot Page Options menu.
- Select Unpublish.
Expected result
- The page returns to a Draft and is no longer visible to students.
Troubleshooting
My scheduled page didn't publish
- Confirm the scheduled date and time have actually passed. A page becomes visible to students the moment its publish time elapses; students may need to refresh.
I published a page but a student still can't see it
- Confirm the page shows no Draft or Scheduled badge.
- If the page is pinned as a navigation tab, note that draft pages are never shown to students even when the tab is set to visible. See Add pages to course navigation.
I don't see Publish or Schedule… in the menu
- The Page Options menu is teaching-team only, and its entries follow the page's current state: a draft offers Publish and Schedule…, a scheduled page offers Publish, Change schedule and Cancel schedule, and a published page offers Unpublish.