Create and organize pages
Overview
Pages let your teaching team publish free-form course content — module overviews, reading guides, policies, resource lists — directly in TeachFront. The Pages tab is a two-pane view: a tree sidebar of your directories and pages on the left, and the selected page on the right. This article covers creating pages, organizing them into directories, moving them, and setting the page that opens first.
Before you start
- You must be an instructor or on the teaching team for the course.
- The Pages feature must be enabled for your course. When it is on, a Pages tab appears in your course navigation.
Open the Pages tab
- Open your course in TeachFront.
- Select Pages in the course navigation.
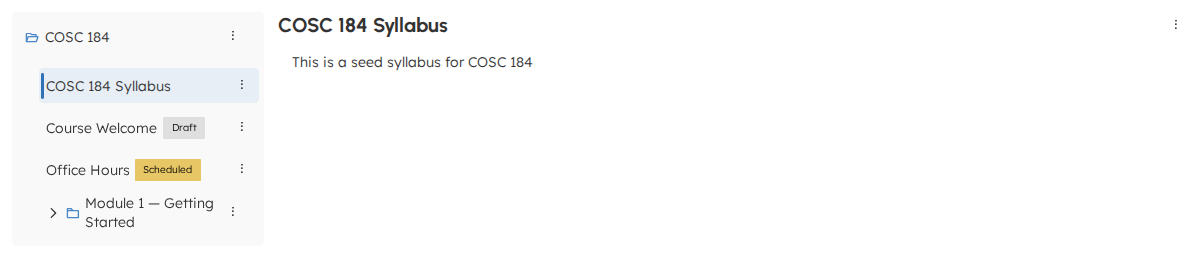
- The Pages tab opens a page straight away: your course's default page if you have set one, otherwise the first page in the tree. Select any page in the sidebar to switch to it.
If the course has no pages yet, the right-hand pane shows This course has no pages yet. with New Page and New Directory buttons.
Create a page
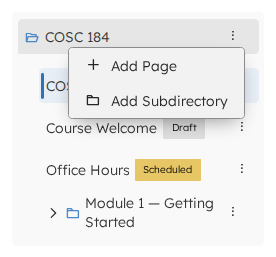
Pages and directories are created from the kebab (three-dot) menus in the tree sidebar.
- In the sidebar, find the row you want the page to live in: the top row — named for your course — is the course root, and each directory row sits beneath it.
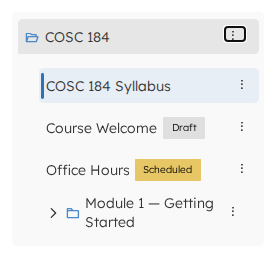
- Select that row's three-dot Directory Options menu.
- Select Add Page.
- Enter a name when prompted, then select Save.
- The new page opens so you can add content. New pages start as a Draft — only the teaching team can see them until you publish. See Publish pages.
Expected result
- The page appears in the sidebar, inside the row whose menu you used.
- While it is a draft, its sidebar row carries a grey Draft badge that only the teaching team sees.
Add content to a page
- Open the page.
- Select the three-dot Page Options menu at the top right of the page, then select Edit.
- The page title becomes an editable Page name field and the content area becomes a rich-text editor. Edit either, or both.
- Select Save to keep the page as it is, or Save and Publish to save and publish it in one step. Cancel discards the edit.
Create and nest directories
Directories group related pages. You can nest a directory inside another directory to build a hierarchy.
- In the sidebar, open the Directory Options menu on the row you want the new directory to live in — the course root row for a top-level directory, or an existing directory row to nest one inside it.
- Select Add Subdirectory.
- Enter a name, then select Save.
To rename or delete a directory, open that directory's Directory Options menu and select Rename or Delete. The course root row offers only Add Page and Add Subdirectory — it cannot be renamed or deleted.
Expected result
- Deleting a directory never deletes its contents. Its pages and subdirectories move up to its parent (or to the course root). The confirmation dialog says so before you commit.
Use the tree sidebar
The sidebar mirrors your course's structure:
- The top row is your course root. Pages that sit at the course root appear directly beneath it.
- Each directory is a collapsible row with its pages and subdirectories nested inside.
- Page rows carry badges where they apply: Default for the course's default page, Draft for an unpublished page, and Scheduled for a page waiting on a publish date.
Select any page row to open it in the right-hand pane.
Move a page to a different directory
- Open the page you want to move.
- Select the three-dot Page Options menu at the top right of the page.
- Select Move….
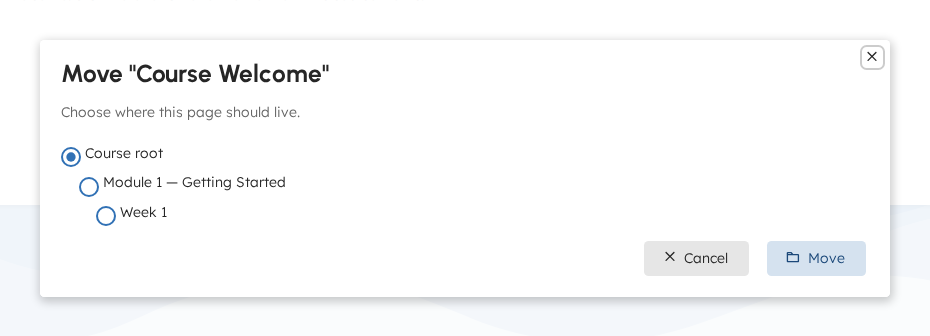
- In the Move dialog, choose a destination: Course root moves the page out of all directories, and every directory in the course is listed beneath it, indented to show the hierarchy.
- Select Move.
The move takes effect immediately, and the page's position in the tree sidebar updates. The page title also shows its directory path, so you can confirm where it landed.
Choose the page that opens first
- Open the page you want as the default, or find its row in the sidebar.
- Open the three-dot Page Options menu.
- Select Set as default page on Pages tab.
Expected result
- The page's sidebar row gains a blue Default badge, and the menu entry is greyed out for the page that is already the default.
- Opening the Pages tab now opens that page first.
Delete a page
- Open the page, or find its row in the sidebar.
- Open the three-dot Page Options menu and select Delete Page.
- Confirm in the dialog. Deleting a page cannot be undone.
Troubleshooting
The Pages tab isn't showing
- The Pages feature is enabled per course. If you don't see a Pages tab, confirm the feature is turned on for your course.
I don't see the three-dot menus in the sidebar
- The Directory Options and Page Options menus are teaching-team only. Students see the tree and the pages, but no management actions.
A student says they can't see a page
- Students only ever see published pages. Confirm the page carries no Draft or Scheduled badge. See Publish pages.