Manage student tokens
Overview
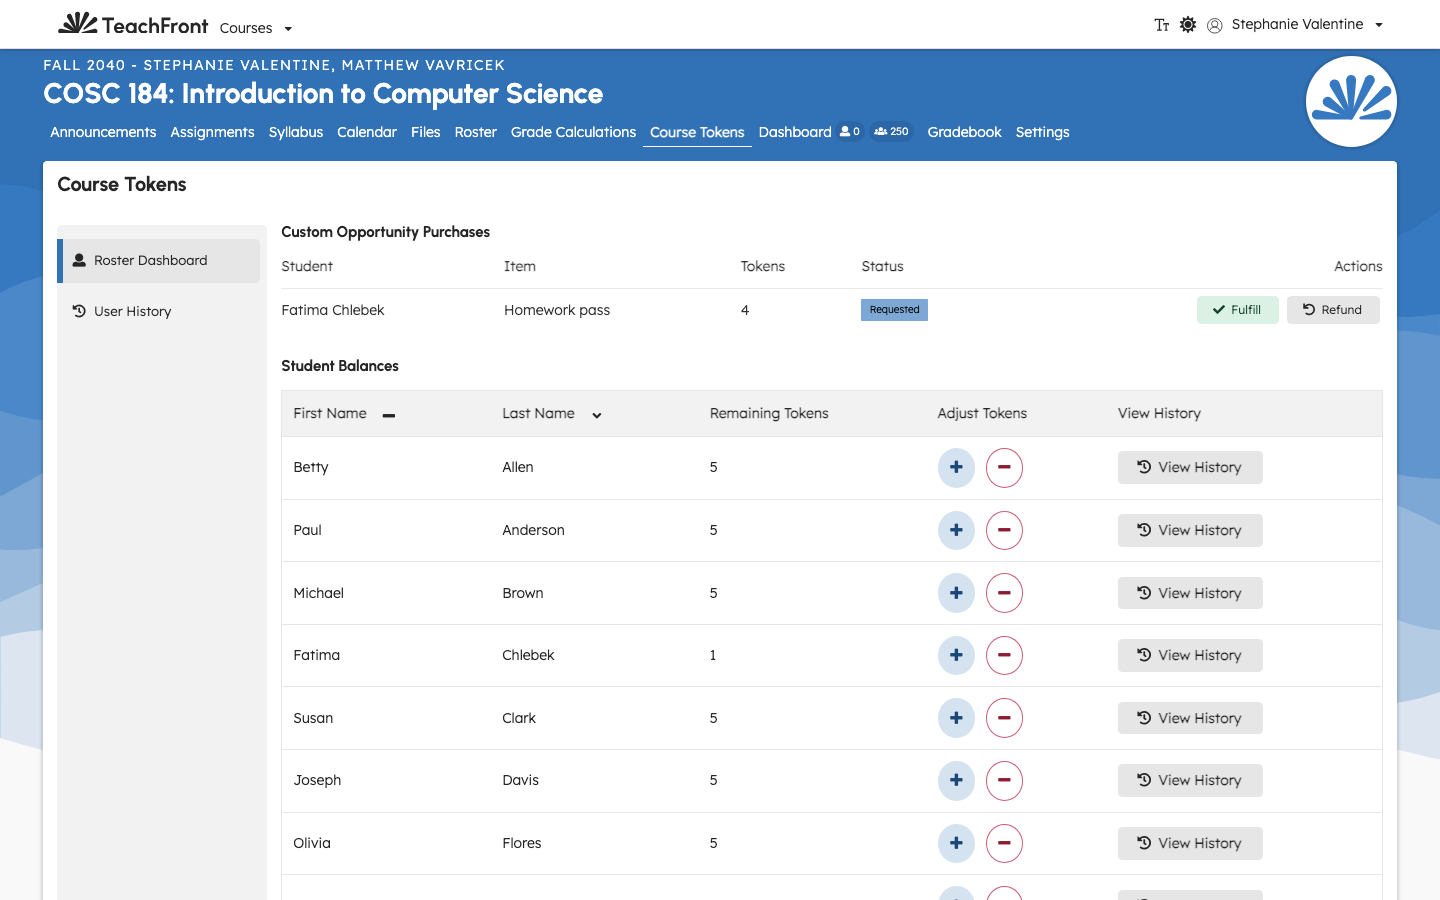
The token roster dashboard shows every enrolled student's remaining token balance. From here you can grant additional tokens to individual students and open a student's full usage and grant history.
Before you start
- You must be an instructor or on the teaching team for the course.
- The Course Tokens feature must be enabled for the course, and Enable course tokens must be on in settings.
View balances
- Open your course in TeachFront.
- Go to Course tokens → Dashboard.
- The table lists each enrolled student and their remaining tokens. Sort by any column header.
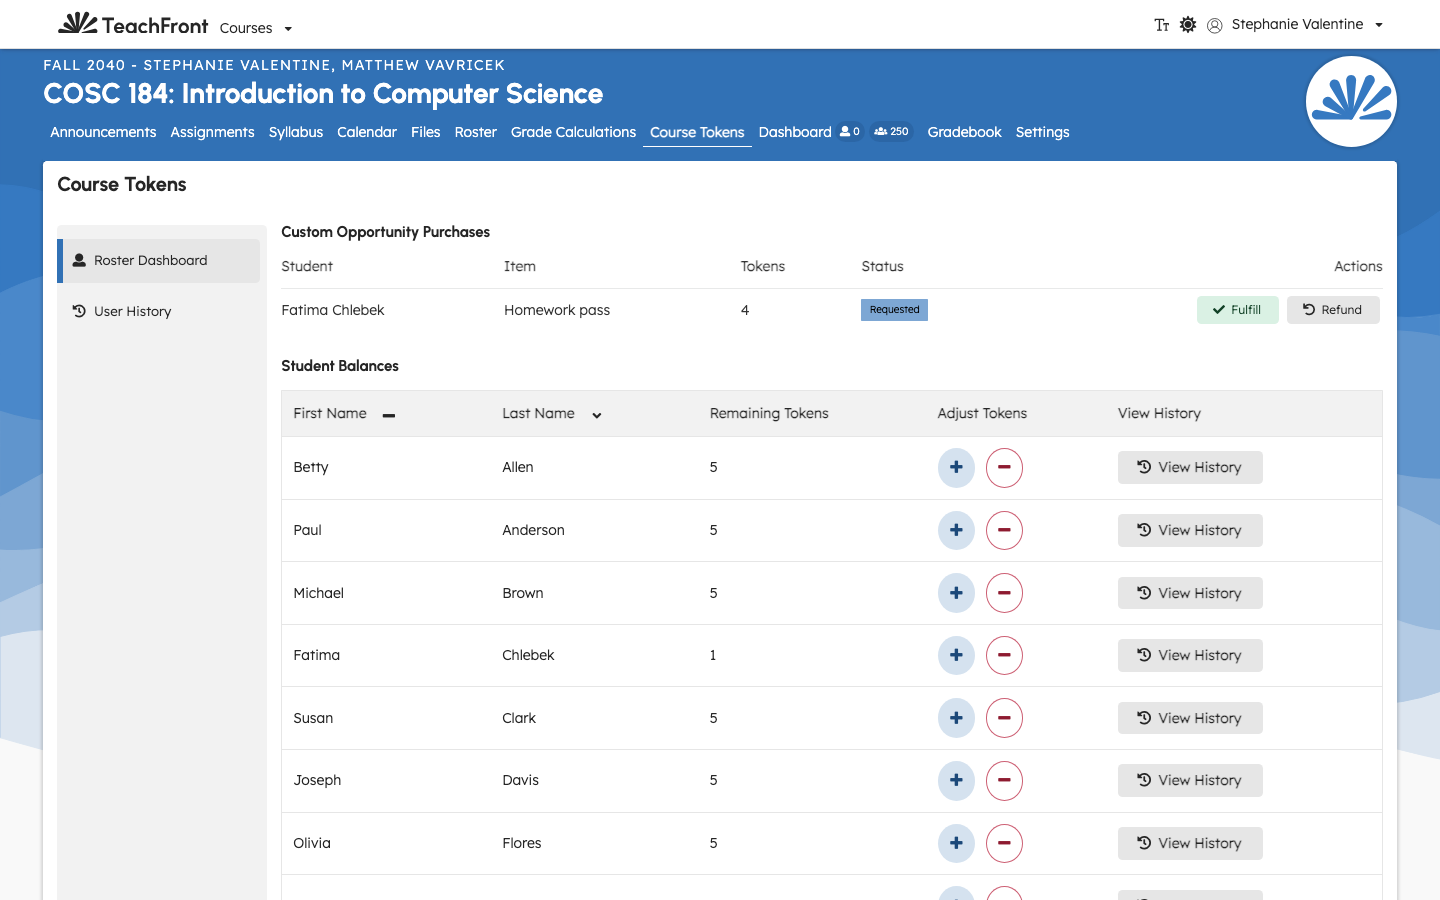
Students without a persisted pool row display at the configured starting balance from Defaults. Balances update live as students spend tokens — you do not need to refresh the page.
If no token settings have been saved yet, the dashboard shows an empty state prompting you to configure tokens first.
Adjust a student's tokens
Each student row has an Adjust Tokens column with a + (grant) and a - (deduct) button.
Grant tokens (+)
- On the dashboard, choose + for a student.
- Enter the number of tokens to add, and an optional note.
- Confirm.
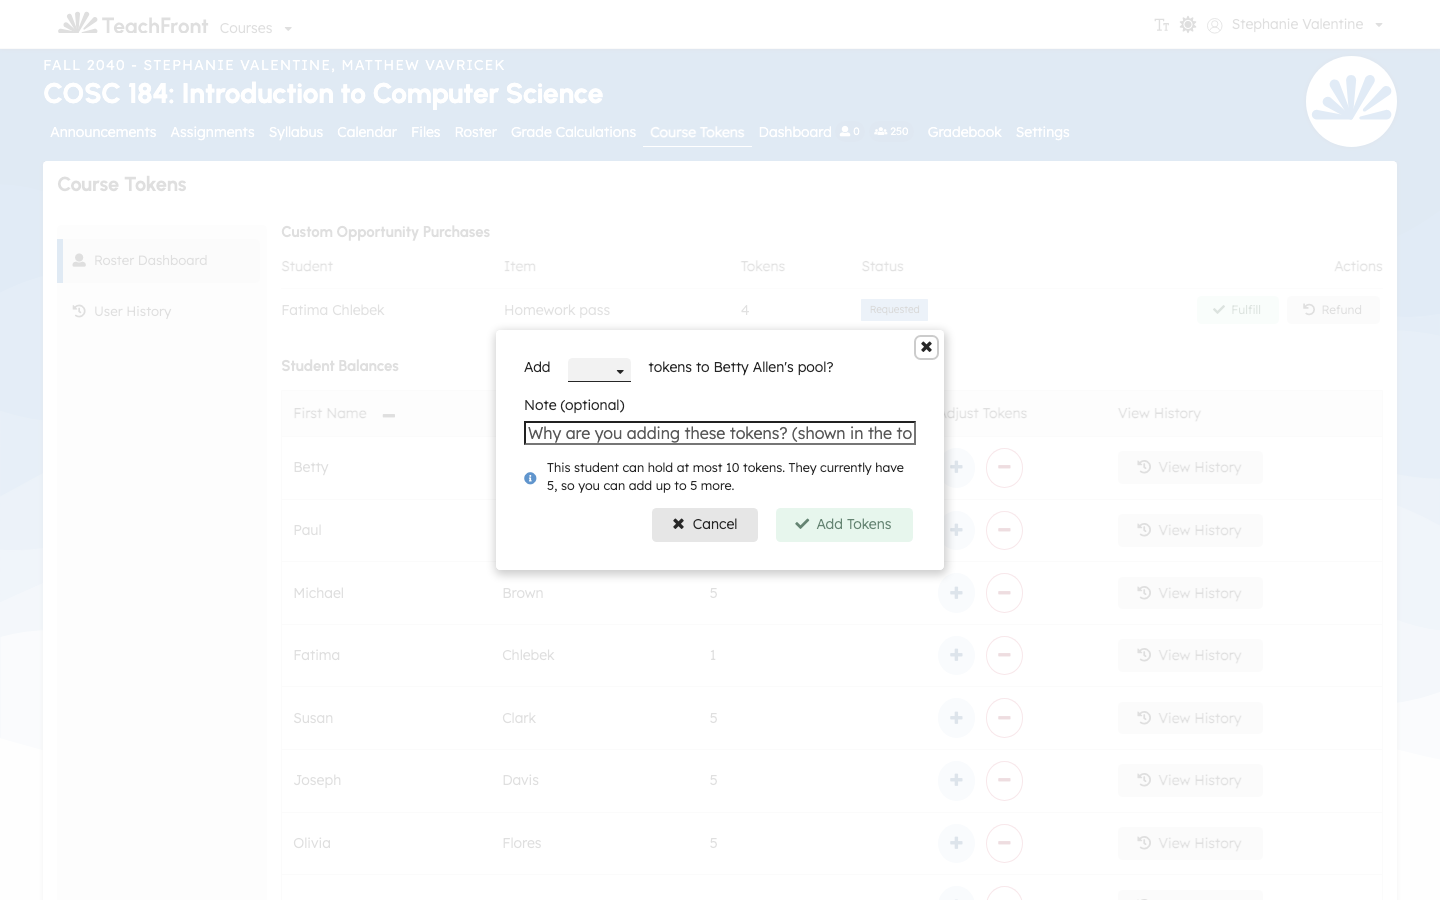
You cannot push a student above the Defaults maximum balance. If the amount you enter would exceed it, the grant is rejected with a specific cap message.
Deduct tokens (-)
Deducting lets you charge a student on their behalf — for example, when a student uses an allowance but does not self-report.
- Choose - for a student.
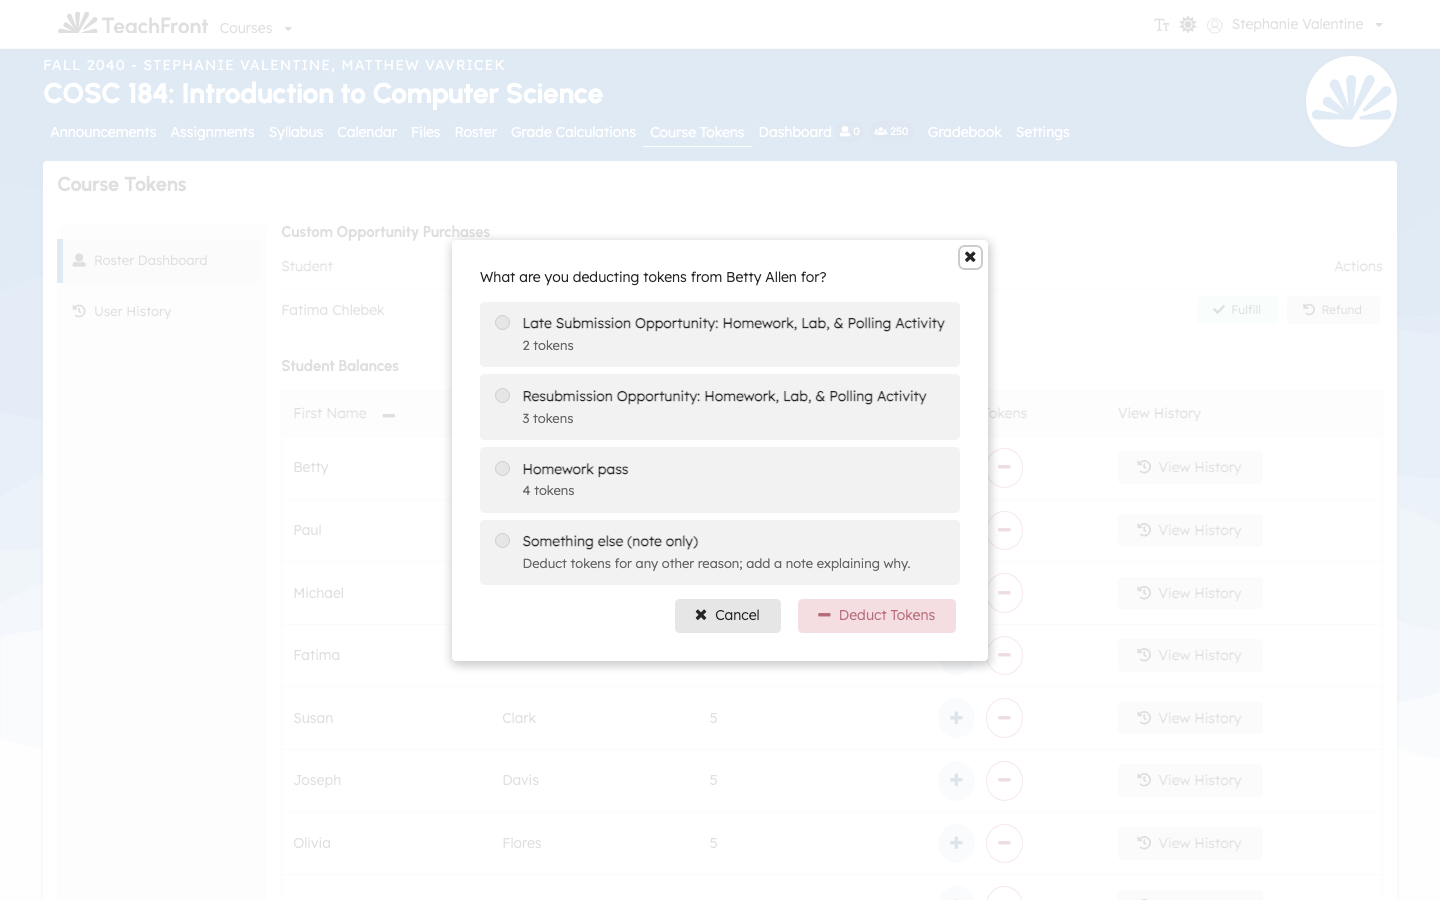
- Pick what you're deducting for from the list of the course's configured opportunities, or choose Something else (note only) and add a note.
- Choosing an opportunity pre-fills its token cost. The amount can never exceed the student's current balance.
- Choose Deduct Tokens.
Every grant and deduction is recorded server-side with who did it, how many tokens, and when, so adjustments stay auditable. Manual deductions appear in the student's history attributed to you.
Review custom opportunity purchases
When students spend tokens on a custom opportunity (a reward you fulfill by hand), each request appears under Custom Opportunity Purchases at the top of the dashboard, showing the student, the item, the tokens spent, and a status of Requested, Fulfilled, or Refunded.
- Fulfill — mark the reward delivered. The tokens stay spent; the status becomes Fulfilled.
- Refund — return the tokens to the student and mark the request Refunded. The student can request again.
Review a student's history
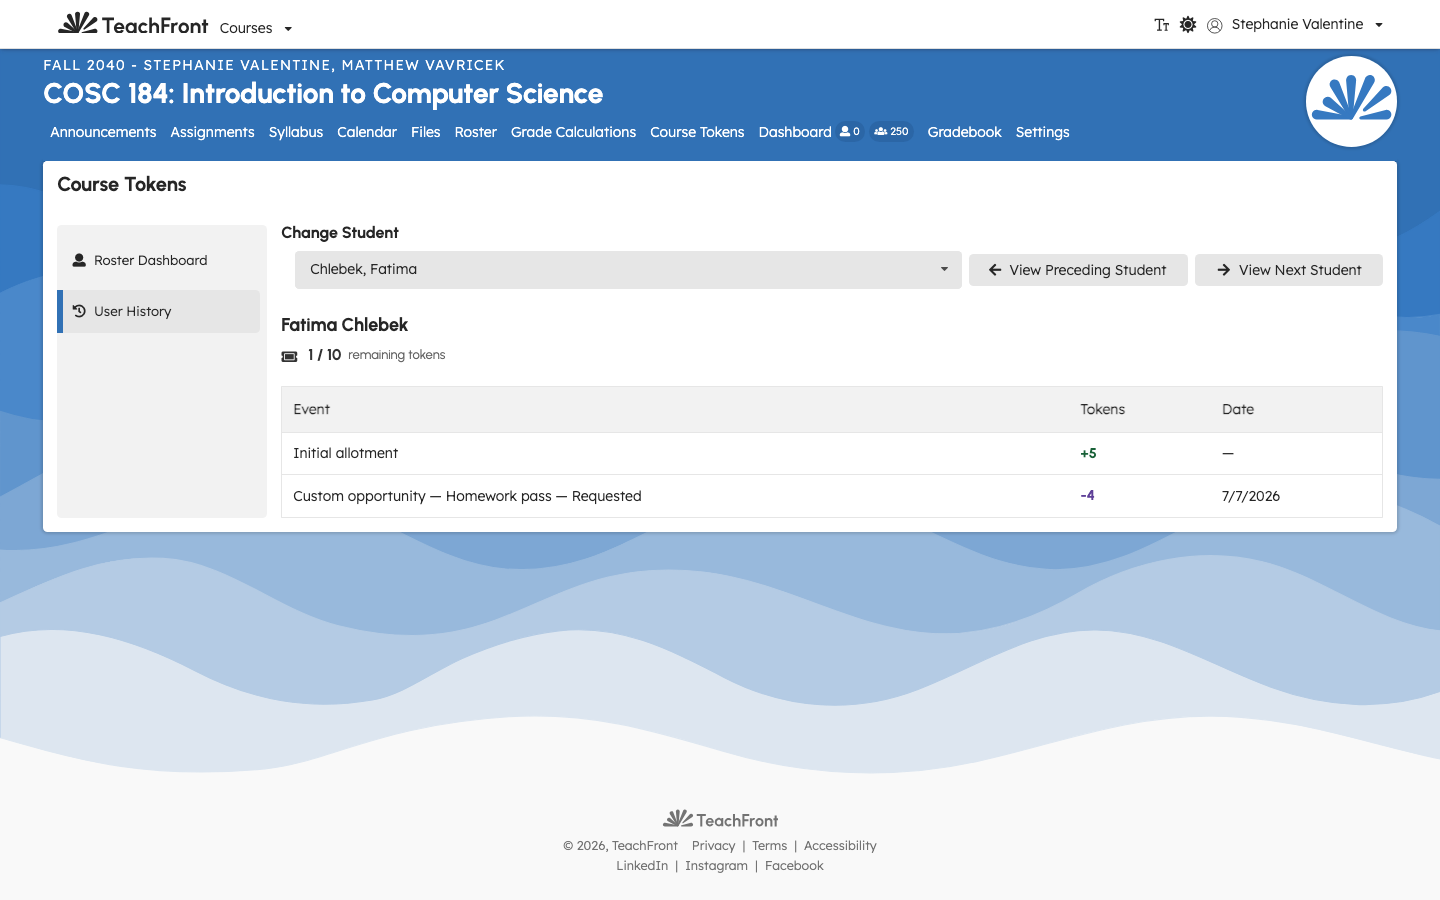
- From the dashboard, open a student's usage history, or go to Course tokens → User History and pick a student.
- The page header shows the student's current balance and maximum (for example, 2 / 10).
- The table shows:
- Initial allotment — the starting balance from Defaults (shown even when the student has no activity yet).
- Spends — tokens used, the date, the action type, and the assignment name when available. Custom-opportunity spends also show their Requested / Fulfilled / Refunded status.
- Granted tokens — instructor grants (and refunds), with the amount and date.